Introduction to Mechatronics
Hands-on philosophy
Welcome to the Mechatronics portion of the EDI Bootcamp! This guide will introduce you to the parts in your lab kit, how to build circuits, Arduino programming, and the design process for electromechanical projects. You don’t need experience in any of these topics to get started! But you do need some desk space, a laptop, and some nimble fingers, because this is hands-on exploration and play time. Each section of this manual will guide you through a topic, show you one way to build a project, and then ask you to give it a try for yourself. Some solutions can be found at the end of the manual. It is important that you attempt to solve the exercises first, before jumping to the solution. The best way to use this material is to get your hands dirty, that’s where most of the learning happens!
How to get help
Whether you are in EDI Bootcamp or you happened upon this guide online, you are probably working on it individually, maybe even remotely. This is definitely not the ideal situation. A second set of hands and eyes, especially ones with experience, can make the difference between a fun and a frustrating project. Just remember that it is all part of the learning experience. In fact, the skill you will be practicing most is debugging. Usually debugging is associated with computer programming, but it can be applied to almost any task. Debugging is a “soft” skill, a process that must be experienced rather than taught. This manual will point out some techniques as it goes, but your best option is be methodical: document your work as you go, test as you build, and keep an open mind.
Bootcampers will be able to take advantage of office hours. Please come prepared with a sketch, circuit diagram, or your physical circuit.
Mechatronics and rapid prototyping
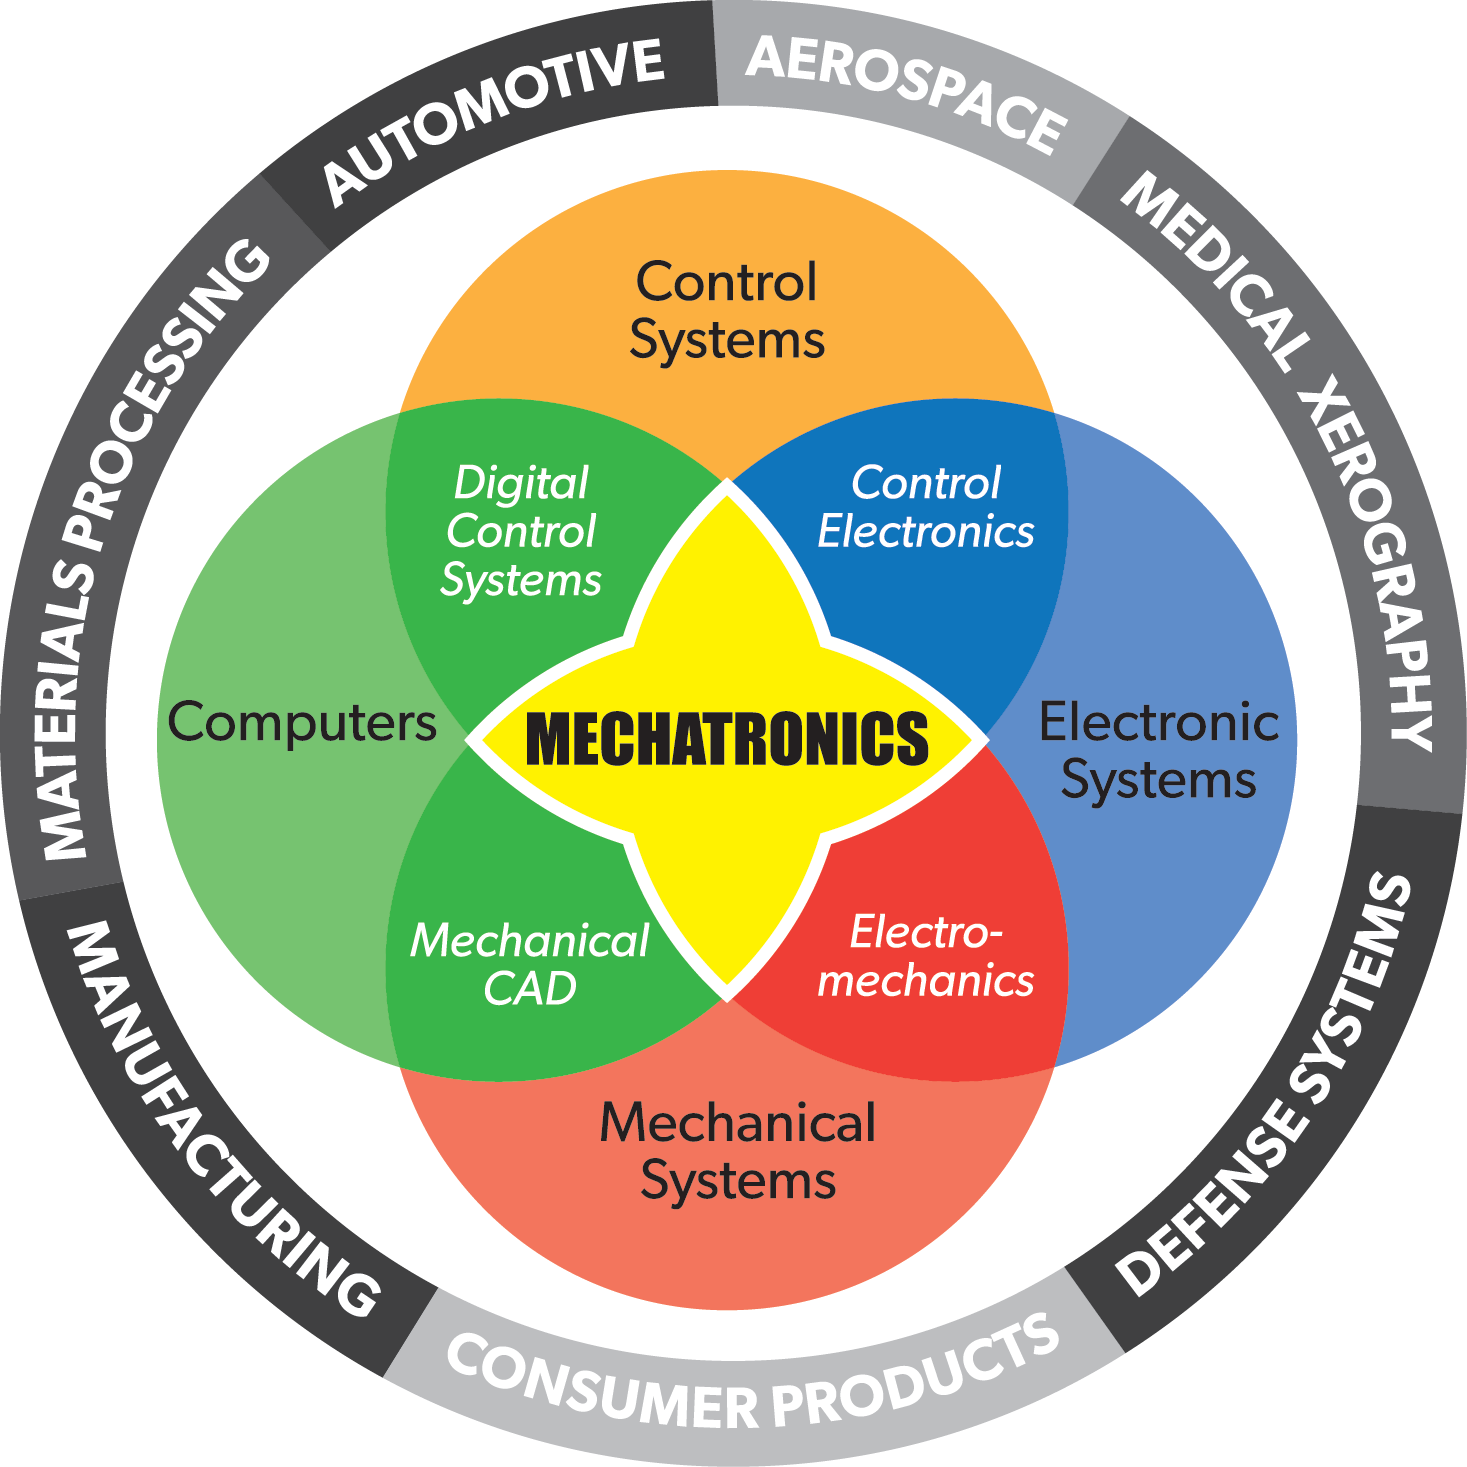
Mechatronics is the field of electromechanical design. It combines mechanical engineering of the physical design, electrical engineering of the sensors, drivers, and actuators, computer science of programming the code, and control theory for the design of the algorithms that lead from sensing to actuating.
 The Mechatronics venn diagram
You interact with mechatronic objects all the time. A microwave, a cell phone, and a car are all examples of mechatronic objects. Their design can be slick and smooth or chunky and obfuscated. They can also be tiny, expensive, and complicated, all of which point to objects that take lots of experts and time to design and build. But this is not necessarily the case. Hobbyist tools and open source software have reduced the barrier to entry to such low levels that mechatronics has become accessible to anyone with a laptop and the internet. Ideas that previously were left sketched out on the back of a napkin can now be whipped up with microcontroller dev kits and 3d printers in a matter of hours instead of weeks in a process referred to as rapid prototyping.
Arduino and ESP32
The tool that makes this all possible is Arduino. Before Arduino, electronic development tools were expensive and proprietary. The Arduino project, started at MIT, developed open source software and hardware that took advantage of the power of a laptop to allow everyone to write and compile code and place it on a low cost USB powered device. This spawned a DIY revolution that has created low cost 3d printers, inexpensive drones, and a dozen companies that cater to the community with an endless supply of cool sensors, LEDs, motors, and sample code.
“Arduino” is a loose term to describe the program where you write your code, a name for the electronic board that runs the code, and the code itself. But technically the program is an IDE, and there are several that you can choose to use, not just the official Arduino IDE. There are many brands of microcontroller boards that can be programmed using the IDE, not just official Arduin boards. And the code is technically C++, but don’t let that scare you away!
In this guide, we will use a microcontroller board from the company Espressif and assembeled onto a breakout board by Adafruit, called the Feather Huzzah32. This ESP32 is a modern 32bit ARM microcontroller running at 240MHz, with 4Mb program space and 520k SRAM, and can talk bluetooth and wifi, for about $18. Compare that to the classic Arduino Uno, with a 16MHz 8bit microcontroller, with 32k program space and 2k RAM, for about $30! The ESP32 runs the same code as the Uno and is also programmed using the Arduino IDE (using an add-on package), making it a super powerful electronics rapid prototyping board. There are lots of other microcontrollers available that use Arduino, some even run Python!
Other resources
The world of Arduino and accessible mechatronics would not exist without the dedicated DIY community behind it. You can find a list of our most commonly used suppliers and some great blogs in the Appendix.
Who am I and where to find me
This manual is written by Nick Marchuk, Senior Lecturer in Mechanical Engineering at the McCormick School of Engineering and Applied Science at Northwestern University in Evanston, IL. Nick runs the Mechatronics Design Lab in the Ford Building, right next to the Prototyping Shop. The Mechatronics Lab contains oscilloscopes, power supplies, multimeters, function generators, soldering irons, 3d printers, and parts like wire, buttons, LEDs, and ICs. The lab is open on weekdays from 9am-6pm, and available 24 hours with wildcard access. Nick’s office is in the back of the lab, and Nick is available for open office hours every day according to the schedule posted on the door. (Please check with Nick for updated lab and office hours during Covid).
Nick can be reached at nick.marchuk at u.northwestern.edu